


Installing an EFPlus.com eForms SmartBOX
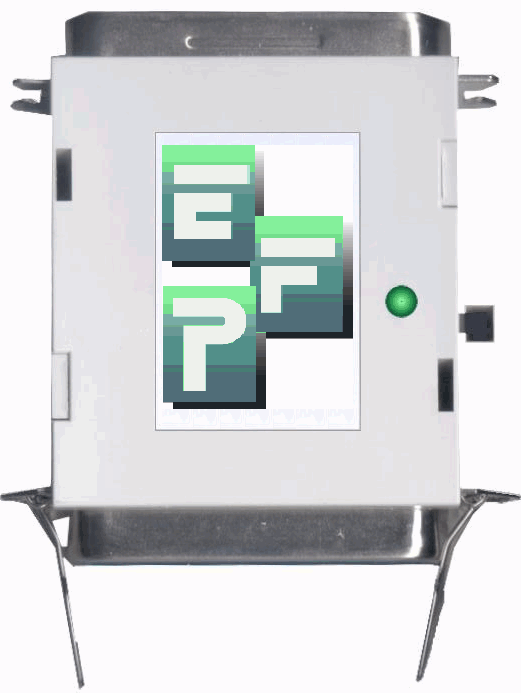 The eForms
SmartBOX brings eForms image storage in a small external package to any Laser
Jet compatible (PCL 5) printer. The SmartBOX offers:
The eForms
SmartBOX brings eForms image storage in a small external package to any Laser
Jet compatible (PCL 5) printer. The SmartBOX offers:
- very easy installation (no need to open the printer)
- ability to update multiple eForms images (by unique ID number) remotely at a moments notice
- not sensitive to the printer model and so printers may be swapped in and out as needed
- external installation makes it unlikely that the BOX will accidentally be lost if a printer is returned for service
To use the eForms SmartBOX, the printer must...
-
...be near an electrical outlet for the power adapter which is included with
the unit. The AC adapter provides OUTPUT: 6VDC 800mA on a 2.5mm plug
with positive center which is required by the SmartBOX for reliable operation.
Some printers (older IBMs especially) will provide enough power via the parallel
port connector for the SmartBOX to operate in a minimal way without the AC
adapter. This results in the loss of the adapter not being noticed if it
happens to fall out or be unpluged. Be sure you have a working AC adatper
before upgrading printers. Replacement units are available at or near cost.
-
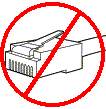
...have a "centronics" parallel port connector. Please take care to verify
that it is the standard "type B" connector rather than the much smaller "type
C" (see:
IEEE
1284 Connectors for pictures) If you do have the "type C" connector on
the printer, a C to B adapter (rather than an A to C cable) will be required.
Belkin
1FT IEEE 1284 B to C Par Printer Cent36F/Microcent36M Adapter Cable
-
...be connected directly to the workstation or to an approved external
network adapter using a true IEEE 1284-1994 printer
cable which is included with the unit.
-
...if connected via the network rather than by a
workstation, be connected via an approved external network adapter.
If the network cable plugs directly into
the printer, that connection can not be used. Jetdirect printer servers may
NOT be used except as noted. The following adapters are known to work:
- Pocket Print Server by Troy Wireless. Model TROY-2833 (Available at CDW)
-
External Jet Direct 300X Model J3263-6001
Parallel cable: Ok! Net cable: No. Use NetBOX or XPS driver 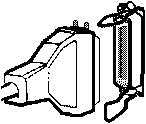 Note:
"connected to the network" does not mean "connected via the network".
Many devices, especially printers, can be connected by a parallel cable to
a local workstation and still be used by other workstations over the network.
The only way to know how the unit is connected is to physically look at the
connector.
Note:
"connected to the network" does not mean "connected via the network".
Many devices, especially printers, can be connected by a parallel cable to
a local workstation and still be used by other workstations over the network.
The only way to know how the unit is connected is to physically look at the
connector.
Printers that are most often supported via the SmartBOX:
For printers connected by a network cable (looks like a telephone cord) use XPS driver or a NetBOX.
Installation is very easy:
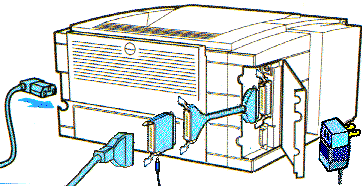
-
Power off the printer.
-
Disconnect the existing parallel cable from the printer and workstation and
discard it. Please do NOT use the existing
cable, even if you believe it to be compliant. Using the long
cable provided with the SmartBOX, plug the end with the smaller connector
into the workstation. Route the cable to the printer but do not plug it in.
-
Plug the SmartBOX's AC adapter into an available electrical outlet and connect
it to the box. Verify that the light on the SmartBOX is BRIGHTLY lit. Please
do this before connecting the box to the printer or workstation.
-
Connect the SmartBOX into the printer’s parallel port. If the port is
under a cover, you may use the "pigtail" or short extender
cable, but if possible, plug the SmartBOX directly into the printer. Be sure
to lock it in with the clips, so that it will not come loose when the printer
is pulled out.
-
Plug the long cable (from the PC workstation) into the connector on the back
of the SmartBOX (with the clips).
-
Power on the printer.
Continue on to the next set of instructions for Electronic Forms Installation for your system
Future eForms changes can be instantly loaded into the SmartBOX!
In the future, if there is a change needed on your forms, including new logos, changes to service hours, phone instructions, advertisements, etc... those changes can be emailed to you from our office and updated in the SmartBOX at your site. Chip replacement is no longer necessary.
First, verify that the BOX has a small white sticker starting with PGEN 1.0... If you see a "Program 4.0" or "Program 5.0" sticker or no sticker at all, please be sure to let us know when you contact our office for the changes.
The best way to change the forms is to fax us a sample of the existing form, with the changes you want to make marked up on that sample.
Also:
Troubleshooting
When connected to a printer, the light on the SmartBOX will be:
- Yellowish green or out during normal operation. Note: This does not assure that the AC adapter is working or that forms are loaded; please see below.
- Reddish orange (solid, not blinking) to indicate that the printer is not ready or that the AC adapter is not supplying power. Please check the printer front panel and AC adapter as described below.
- Red and rapid blinking to indicate that the forms images need to be reloaded. Pressing the black button will clear the blink and allow printing, however, no eforms will overlay; please see below.
Because the SmartBOX runs the parallel cable faster than most printers alone, it is more sensitive to the length, quality and type of cable used and to the type of communication the workstation is using to talk to the printer. If the printer will not print when the SmartBOX is installed, try bypassing the SmartBOX by plugging the cable directly into the printer. If this allows the printer to print (with out the eForms of course) then the cable, AC power, and workstation configuration will need to be checked. If the printer is still not printing, after bypassing the SmartBOX, please contact your help desk for support on printing issues not related to eForms.
Since the SmartBOX tries to pull power from the printer for emergency operation, you may check for proper AC power ONLY while you have the SmartBOX disconnected from the printer cables. Start by also disconnecting the AC adapter. In other words, disconnect ALL the cables from the SmartBOX. Verify that the light on the SmartBOX is completely out. Now, plug in ONLY the little round black AC adapter cable. The SmartBOX light should be Reddish Orange for about 5 seconds and then turn green or go out. If you see a flashing light instead, the SmartBOX has been erased: Please contact us for an update email. If the light stays orange or red, please contact us for a replacement SmartBOX. If the light does not light up, the AC adapter is defective or has been unplugged at the other end. Please check, then contact us for a replacement AC adapter. AC power is required for reliable operation. The SmartBOX must light up when initially connected ONLY to the AC adapter originally supplied.
Next, check that the cable used between the workstation and the printer is marked ...IEEE 1284 - 1994... along the side of the cable. If not contact us for a replacement. The standard "belkin" printer cable supplied with the workstation and printer will NOT reliably support the SmartBOX. You MUST use our IEEE 1284 -1994 cable as originally supplied with the SmartBOX.
If the cable is correct, the SmartBOX light is green, and the printer still doesn't print, the port in the printer driver is probably set to DOTx rather than LPTx. Click on Start / Settings / Printers... and then right click on the printer name you are using, and select Properties from the pop up menu. Go to the Ports tab and ensure that the LPT type port is selected. This same problem may be caused if the HP printer driver installs an HP printer port monitor. Some of the most recient PCL6 printer drivers from HP are doing this if the entire printing system is installed from the printer CD. If this happens, remove the HP printer driver and any HP printer related items from Start / Settings / Control Panel / Add / Remove Programs. Reboot and install only the standard printer drive using the Start / Settings / Printer... / Add printer wizard.
If you have another station that does print correctly, you can try swapping the SmartBOX, AC power adapter, parallel cable and printer to see which is causeing the problem.
Updates / Reprogramming
"Access Denied" after "Updating...": This is a common error, and easily corrected: Simple restart the workstation and try the update again.
NonLPT1 port: "File not Found" after "Updating..." The update script for SmartBOXes assumes that the parallel port is set as LPT1. In some (very) rare cases, the LPT port may be configured as LPT2 or LPT3. This will cause the update script to show "File not Found" after "Updating...". To correct this issue, the port must be re-configured as LPT1, AND the printer drivers must be updated to print to LPT1.
Note: You will not be able to print once this procedure is started, until the procedure is finished.
Click Start / Settings / Control Panel. Open the "System" icon (which may be under "Performance and Maintenance"). Go to the "Hardware" tab and start "Device Manager". In Device Manager, click the plus sign to the left of "Ports (COM & LPT)". If you don't find LPT1, but you do find LPT2 or LPT3 listed there, then double click on the LPT2 or LPT3 entry, go to the "Port Settings" tab, and change the "LPT Port Number" to "LPT1". Click "Ok" and close all the windows.
Click Start / Settings / Printers and Faxes. On each printer, right click and select "Properties" from the popup menu. Go to the "Ports" tab (if present) and if the check mark is in front of LPT2 or LPT3, change it to LPT1. If there is no "Ports" tab, or the check mark is in front of some other port, do NOT change anything in that driver.
Check to ensure you can still print normally. If not, reverse the changes above and call support.
Once the port is updated to LPT1, try to apply the SmartBOX update again.
Contact Us | Privacy Policy | Return Policy