


Re-setup of EFPlus.com XPS driver after print driver is deleted
If the EFPlus.com XPS driver has been licensed to a workstation, and perhaps has been setup and running, an ill informed user or well meaning support tech may delete the EFPlus.com XPS driver from the list of printer in Start / Settings / Printers and Faxes. It is possible to re-add the driver via the Add Printer icon, but we made it much easier to do:
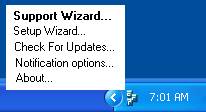
Just right click on the little EFP icon in the tray next to the time (lower
right of the computer screen) then selected the Setup Wizard (NOT
the Support Wizard, the Setup Wizard):
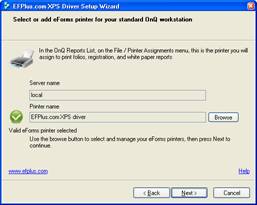
Then run though the panels to the first one where you "Select or add eForms
printer for your standard OnQ workstation":
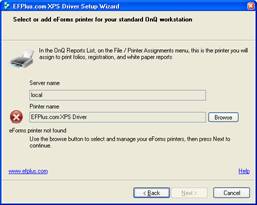
In this example, there is a red flashing X on the left since the EFPlus.com XPS Driver was incorrectly deleted. Don't worry, just press the "Browse" button
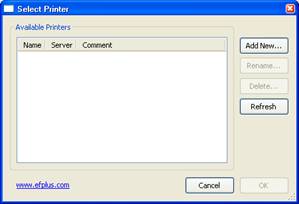
Notice the list is empty. Don't panic! Just click the "Add new…" button and…
type in "EFPlus.com XPS driver" (or whatever you like, but I suggest keeping the name standardized to avoid future confusion)

Then click Ok.
After a moment, you will see the new printer in the list of available printers (it will also now show up under Start / Settings / Printers and Faxes)
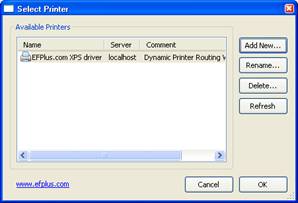
Select it from the list and click Ok.
Now you have a green checkmark and you can proceed by clicking Next
On the next panel, "Select the destination printer for your standard OnQ workstation"

This would normally be the Hilton HPLJ4n printer. Again, if there is a red flashing "X" then press "Browse" and select the correct destination printer from the list.
Press Next, Next, and Finish completing the setup.
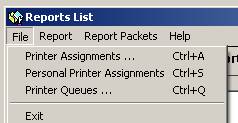
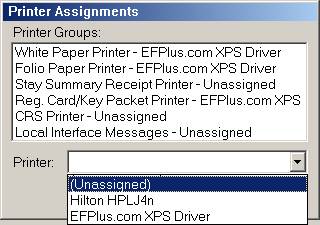
in OnQ FrontDesk under Reports / Reports List..., on the File / Printer Assignments menu assign all of them to EFPlus.com XPS and ensure that the File / Personal Printer Assignments are all set to (Unassigned).

At that point, everything should be working... if you find that you can print,
but the forms aren't overlaid, you may need to download and install the forms
images from:
http://www.electronicformsplus.com/update/
Contact Us | Privacy Policy | Return Policy