

Hewlett Packard LaserJet 2400 series
| Use SmartBOX? | |
|---|---|
| Parallel cable: Ok! | Net cable: No. Use NetBOX |
 |
 |
Installing an EFPlus.com eForms SmartBOX
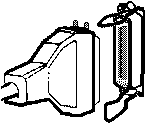
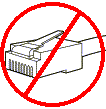
NetBOX support for this printer is only required when the printer will be connected by the network port using the cable that looks like a telephone cord. If the printer is connected by the fat parallel cable with the wire latches, even if it is available over the network, this printer is best supported by the SmartBOX.
Installing an eForms BOX "Program" Versions for network connected printers
LaserJet 2400 series tray select operation
The 2400 has a front panel were you can select PAPER HANDELING then PAPER SIZE and then set the paper size of each tray. From then on, when the printer is asked to print a page of a given size, it will pull from the tray you have selected on that menu.
The Registration / Keypacket stock should be installed in the pull-out tray face down, with the top of the form to the front of the printer.
If you have a third tray (second pull out tray) it can be loaded with plain white paper and the pull down tray in the front can be closed. You will need to power off the printer and turn it back on before the new tray will be recognized by the printer and used.
Registration Key Packet printing
If you will be using the full legal sizex registration / key packet stock:
Load the keypacket stock:
-
Remove the lower tray from the printer.
-
Empty any paper out of the tray
-
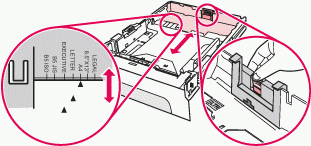
 Squeeze the blue tab at the back of the tray and pull
the tray stop ("Length guide") out as far as it will go. Make sure you can
see "Legal" next to the pointer.
-
Load the keypacket stock face down with the registration slip towards
the front of the tray.
A very common cause of jamming is a rear stop that is set too tight against the stock. Press the stock all the way down in the tray so that the spring locks down, then adjust the rear stop to just touch the paper.
Note that the tray may now extend 2 inches beyond the rear of the printer. Check for anything that may jam against the rear stop. -
 Pull down the "Manual Feed" tray at the front of the
printer below the toner door and above the lower tray. Extend the paper
support and load it with plain letter paper.
Note: The supports on this tray are delicate and easy to break. Please try to push the printer back as far as possible so that people will not walk into the tray as they move around behind the desk.
Contact Us | Privacy Policy | Return Policy
